I like KeePassXC mostly because it’s easy and free. The project is open sourced and based off KeePassX which is based on KeePass, both of which are open source and free too.
The reason we ended up with KeePassXC is that the original KeePass, which came out in 2003, was meant for Windows only. This caused KeePassX to come around and fill the gap and introduce new features. This is the great thing about open source projects; you can branch off and create your own version if you don’t like where it’s going.
The development for KeePassX started to slow down, and this caused a branch of KeePassXC to be formed. KeePassXC began adding new features and keeping the project alive.
I find KeePassXC far easier to use compared to KeePass and since it works on many OS’s I feel its the better one to teach you how to use. You also get features that are lacking in KeePass that are a must-have in today’s world if you ask me.
If you’re new to password managers, KeePassXC is a great first option especially if you want the secure option of a local vault.
Note: I’m NOT paid by KeePassXC to write this.
Download KeePassXC
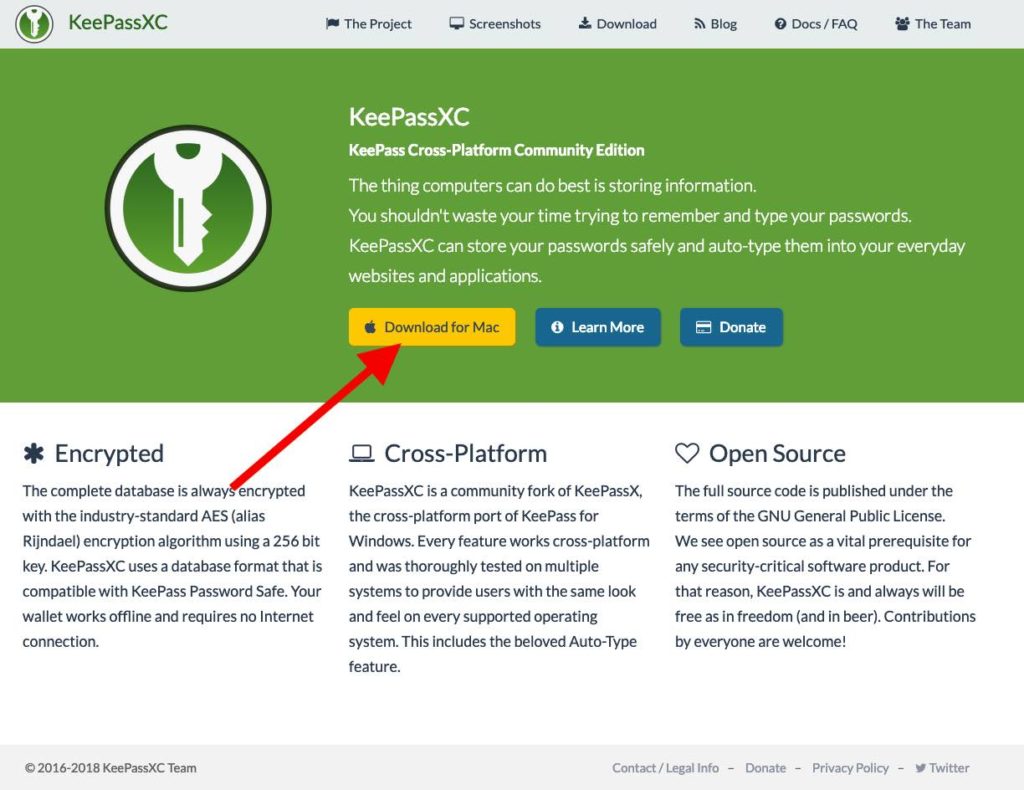
If you haven’t done so already, please download KeePassXC at https://keepassxc.org/
Select the download button in the middle.
If you’re on Windows pick the “EXE Installer 64-bit” as shown by the red arrow below.
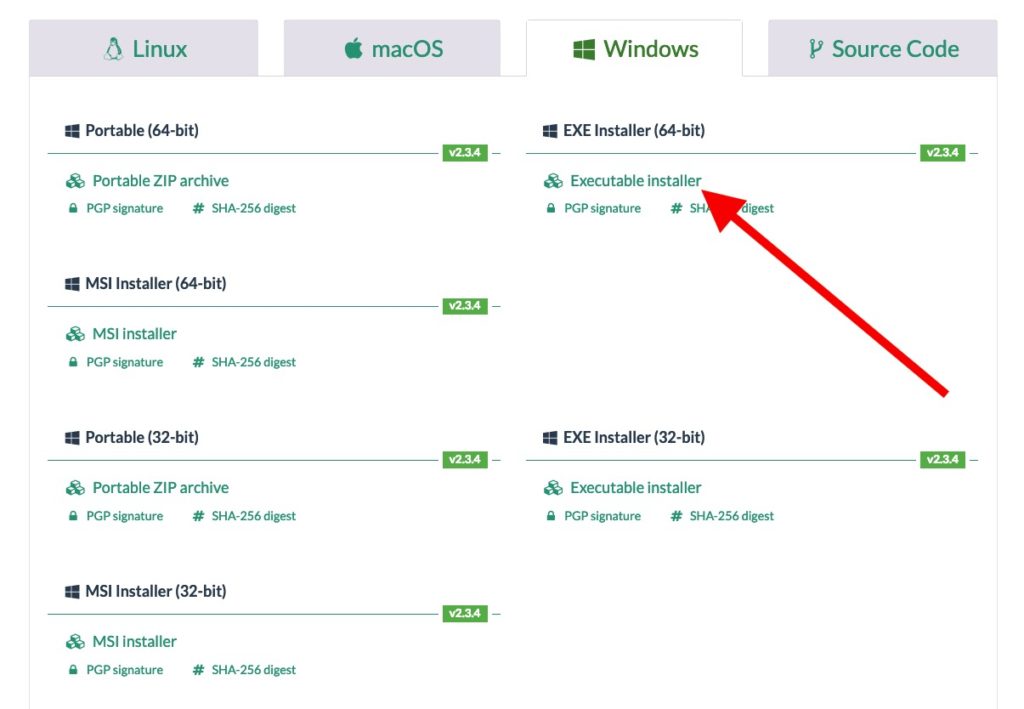
Most computers these days are 64 bit, but if your computer is old (over 10 years old) or it doesn’t install use the 32 bit.
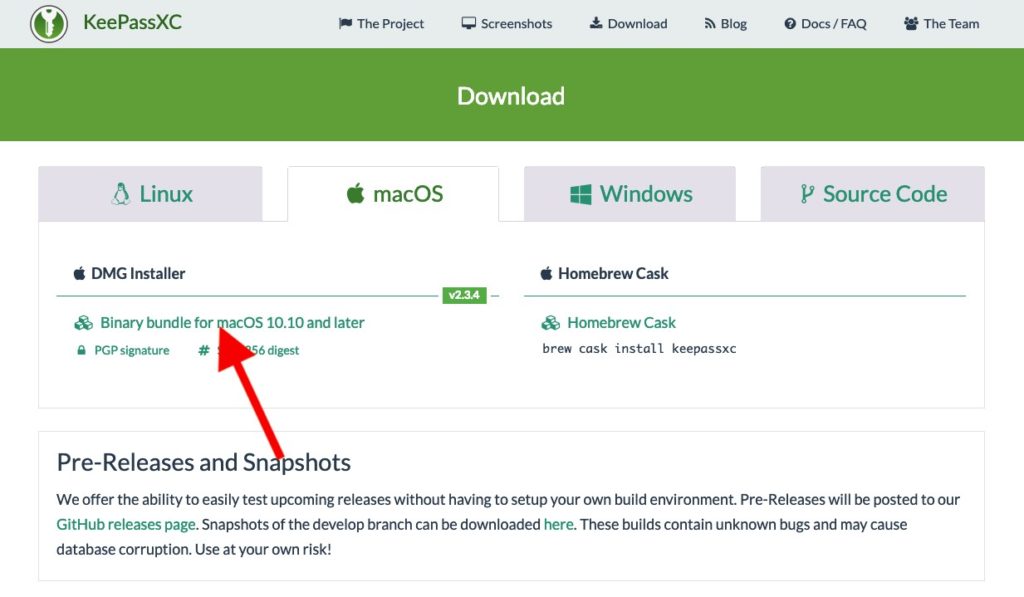
If you’re Mac Select the DMG Installer option that the red arrow below points to.
Once downloaded, open the app and follow your install process.
Create A New Database
When you have installed KeePassXC, you’ll see a screen like this one below.
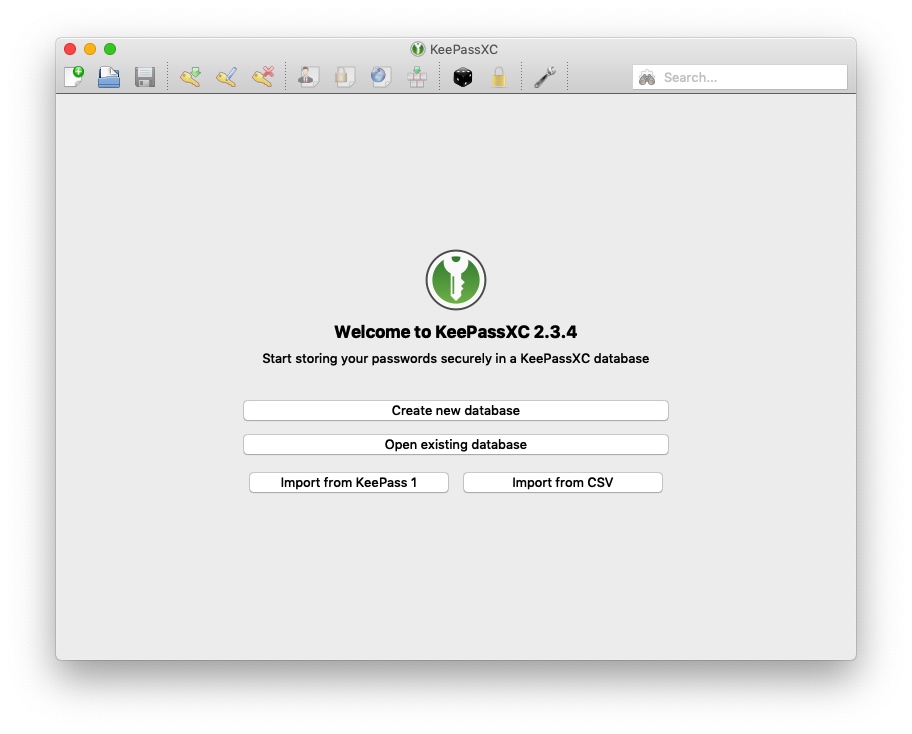
This will be your first vault or database as KeePassXC calls it. Press the “Create new database” button to get started.
Pick A Location
You’ll be prompted to select the name of the database and where to save it.
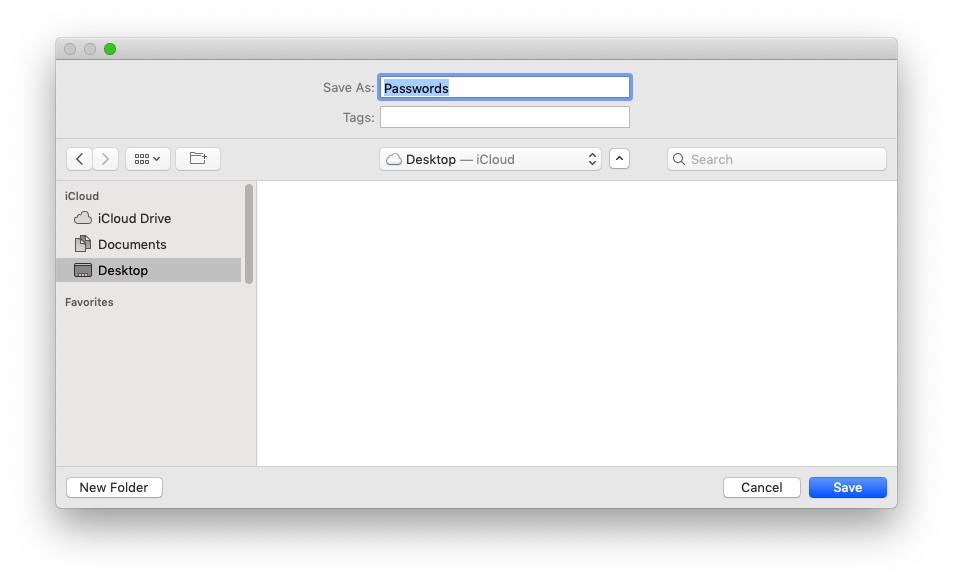
You can name it whatever you want; the data inside will be encrypted so no need to get fancy.
Where you save it does matter. You can keep it on your local computer in documents or even your desktop if you want. You can also save it in Dropbox or any online file back up service. This way if something happens to your computer you still can get access to your Dropbox account and get all your passwords. Just make sure you know your Dropbox password, write it down with your master password and keep both in a safe in your home.
Where you store it depends on your threat model. For the average person storing it on Dropbox or other online services is fine so long as you have a strong master password.
Pick A Master Password
When you have selected a name and where to save the file you now have to pick a strong password.
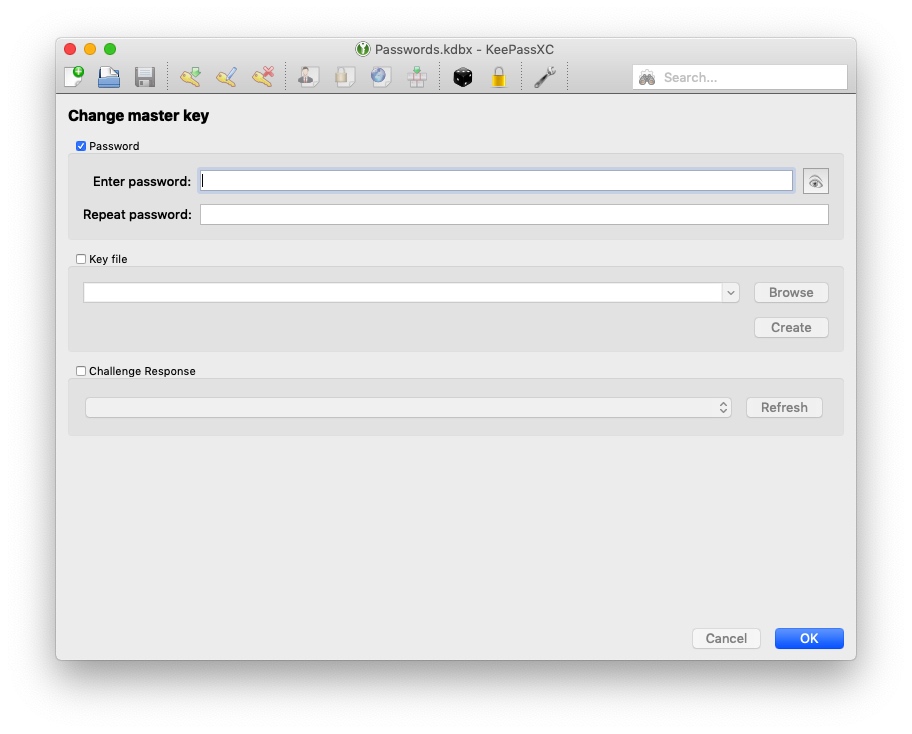
I say 15 or more characters, make up a sentence if you need to. Example: “The sky is rhino pasta!”.
If you forget your master password, you can’t get back in your vault. I suggest you write it down by hand and keep it in a safe in your home.
Key File
I don’t recommend a key file if you’re new to password managers. It can overcomplicate things quickly, so get your feet wet first before you dig in. You can always add a key file later.
Below the master password section, you have a key file option. A key file is a “text” file that has a random password that is generated. To log in, you’ll need the key file and your master password.
KeePassXC combines your master password and key file into one master password that is used to lock and unlock your vault.
You could store the key file on a flash drive, and it must be inserted before you can log into your vault. So even if someone knew your master password, they would still need the key file, this is essentially 2FA.
You could also use the key file only. This way you don’t need to remember anything, just need the actual file to log in.
The key file should be store separately from your vault for the best protection.
Enter Login Details
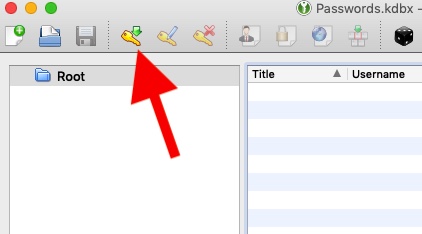
After selecting a password, you’ll get this screen below.
Your vault is empty at the moment so let’s fill it in.
Select the key icon that the red arrow below points to.
You’ll see a blank entry, in the picture below I filled out examples to give you an idea of how it works.
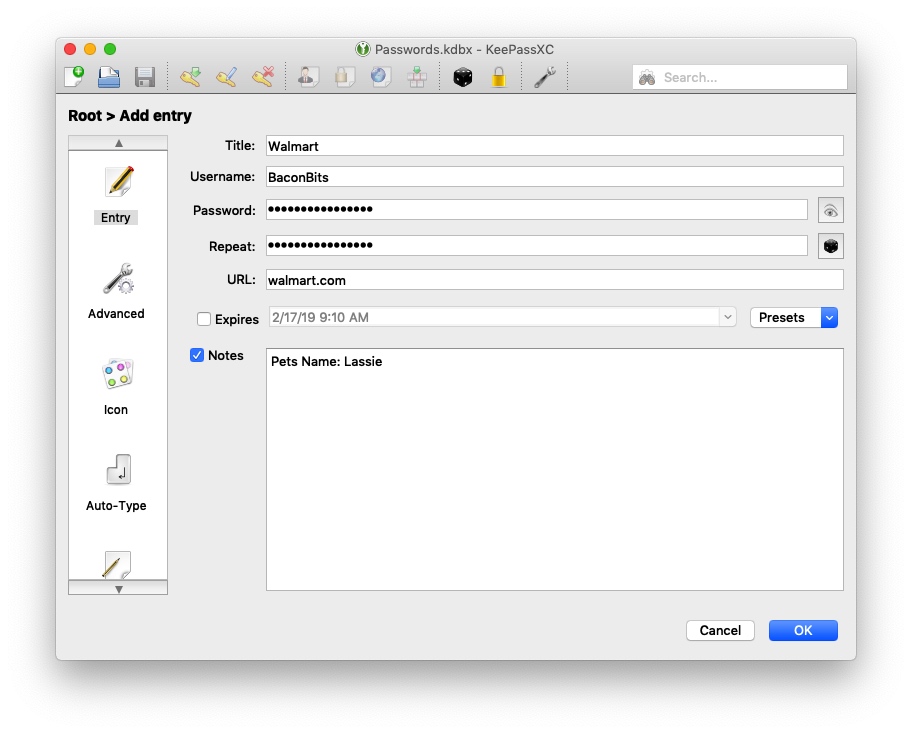
For the title, I like to keep it short for the auto-type feature I’ll show you later.
The username, password, URL are pretty easy to figure out.
The “Expires” is if you want or need to change a password after a specific date. You have presets to the right to quickly pick dates. This does nothing more than alert you when the time is up, and most people don’t need to use this.
The Notes section is where you put things like security questions or general notes about that login.
Generate A Password
The reason you use a password manager is so that you can generate unique passwords for every account. We can do this easily with KeePassXC.
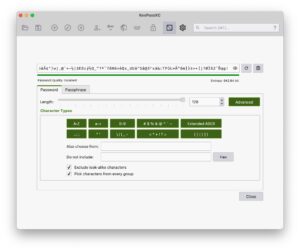
Select the “dice” that the red arrow below points to.
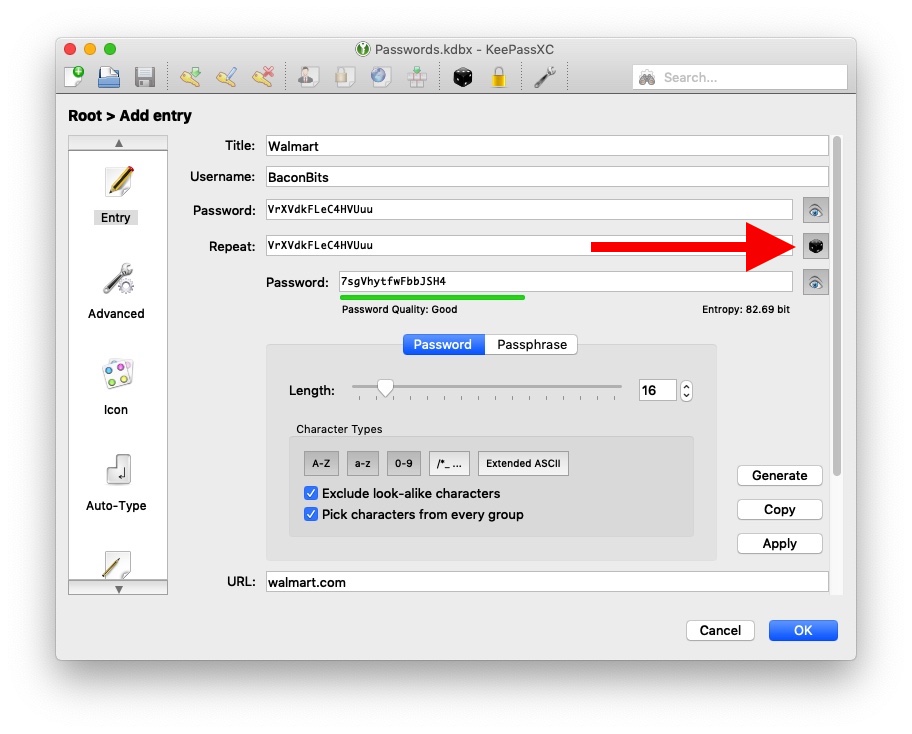
The dice brings up the password generator. If you select the “eyes” above and below it, you can see what the passwords are.
You have the option to generate a “Password” which looks like this “7sgVhytfwFbbJSH4” or a “Passphrase” which looks like this “collector utilize snippet dreamless.”
You generally want to use the “Password” option. The “Passphrase” option is if you ever have to manually enter a password as its easy to type in.
Below that you can select the length. I go over how long your password should be here.
Below length, you have the option to pick character types. Depending on the site they may not allow special characters or numbers, you select or deselect which ones you want.
The “Exclude Look-alike characters” is to keep it from using “o” or “0” and other look-alike characters as they look similar to the human eye.
To the right, you have the “Generate” button to create new passwords. A “Copy” button to copy it to the clipboard of your computer. And the “Apply” button to select this generated password.
The Entropy is the measure of your password uniqueness and randomness. The larger the number, the better.
When done press the “Apply” button.
Once you have the password you want and all the other fields filled out, you can press the “OK” button.
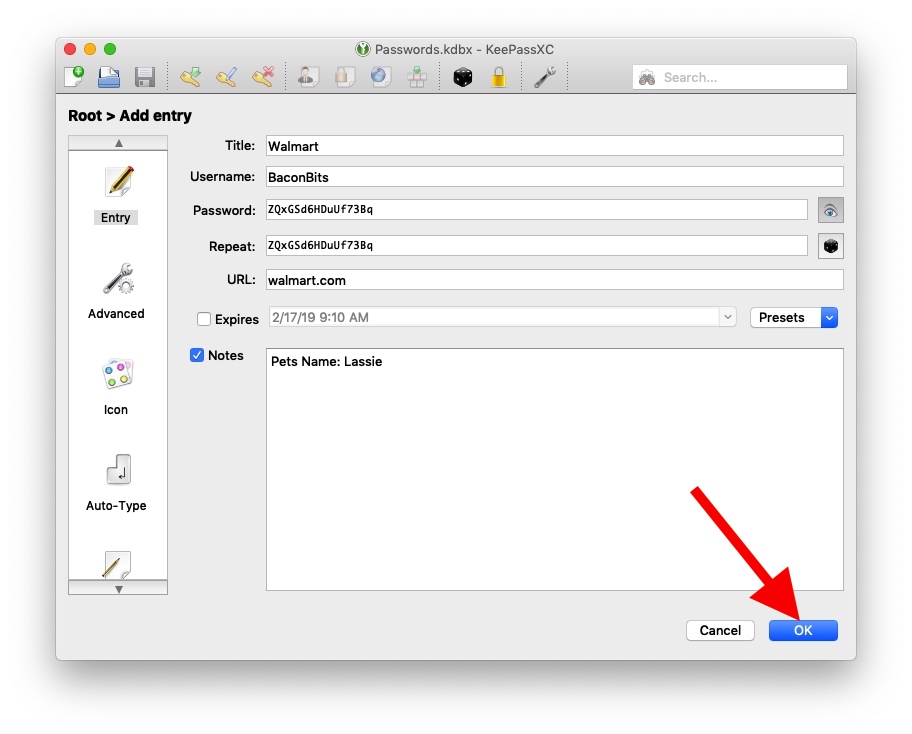
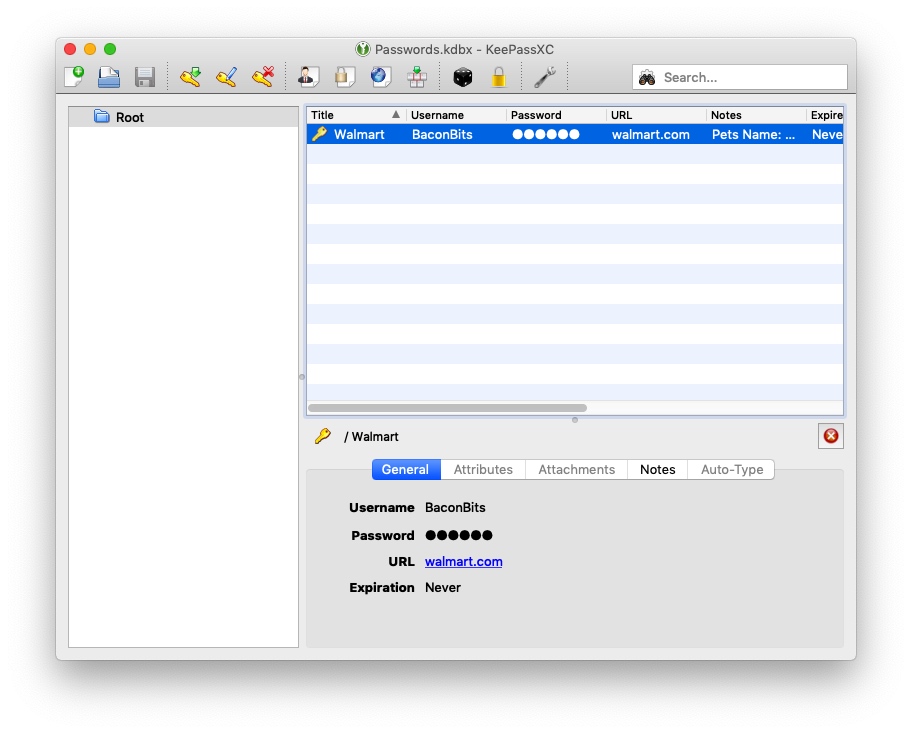
This will save the entry, and you’ll see it in your database.
Repeat this process for the logins you want to store in your new password manager.
Logging Into Sites
After you have filled out your database with login details, you might be wondering how you use it to log in?
There are several ways to do this.
The first way is to do it manually.
Select the entry you want to use. The 3 buttons shown below will copy either the username, password, or URL to the clipboard.

Once copied to the clipboard you paste each item in the correct login field.
Auto-Type
Manually entering passwords can be tedious, that is where auto-type comes into play.
When you have navigated to the login page select the username field so it has a blinking cursor. Then open KeePassXC and choose the entry you want to log in with and press the button the red arrow points to below.
Here is a GIF showing you how to do it.
The auto-type is taking over your keyboard and typing the info for you.
It’s not perfect. If the username and password are not next to each other, this won’t work. But it works for most sites.
You can also do a keyboard shortcut. When you have selected the username field, on your keyboard hit “Ctrl + Alt + a” and it will start typing. This is the setting I use most often because its the quickest. This is also why I say at the start of this article to use a short “Title” for the entries. If it’s for Facebook then just use “Facebook” onl. KeePassXC looks at the name of the window that is open to find the correct login details. The shorter the name the easier it is to match.
If you’re not a fan of the auto-type, they do have a browser extension and they show you how to use it here.
Folders
You can also create folders which they call groups.
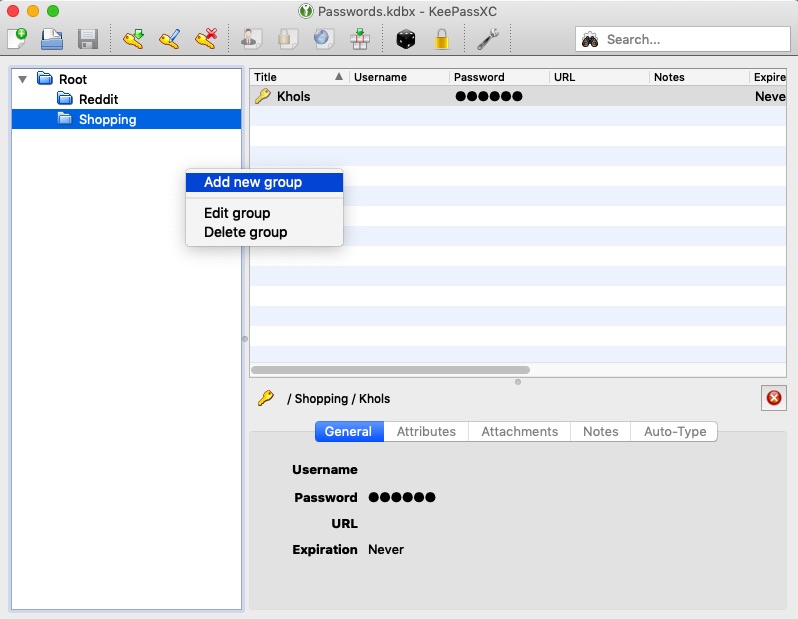
Right-click under “Root” and select “Add new group.” You can also go to the menu bar of the app and select “Groups” and “Add new group.”
Mobile
You’re off to a good start and know a good chunk to get you started using KeePassXC.
There do exist mobile apps that support the KeePass format.
A free option is MiniKeePass for iPhone. I like StrongBox the best, its free with premium upgrades. StrongBox I find to be more user-friendly and integrate better with iOS.
For Android, there is Keepass2Android. You’ll find a lot more apps that support the KeePass vaults on Android phones.

Why cannot you unhide the passwords as you can do in the original Keepass?
I like to see my passwords so that I can also use a login name and password on a PC in my office.
But I could not find that option, or at least it did not work…
Go to settings -> security -> “hide passwords in the entry preview panel” leave it unchecked.
I’ve been a KeePass 2 user for several years – loved it!!! Now I see it’s no longer available in the app store.
Can I use the same database from KeePassXC on my windows laptop for Strongbox on the iPhone?
Yes, they’ll all work together.